My first post on the shiney new website. Really seeing it all come together makes me giddy. I had a request to make this fabulous ruffled dress. I’m pretty sure I need something like this for myself, maybe a skirt, if I can pull it off without looking like I’m 8.
Mama of the birthday girl decided she was also giong to use said dress for pictures and wanted bow ties for the boys to wear, so we had to whip up some bow ties using coordinating scraps from sister bear’s dress. Yay bow ties! ‘Cuz as the Doctor would say, bow ties are cool. In case you want to make some too I’m sharing the process.
Materials:
- fabric
- scissors or rotarty cutter & mat
- 1″ hook and loop tape, I like Velcro®
- Fusable interfacing or felt
- thread and sewing method
- wooden dowel for turning
Our fabric has already been washed and ironed since these are scraps from a previous project. Although I don’t know how often you’d have to wash these, so it may not be as important as with other items, but I pre-wash everything. (even my notions)
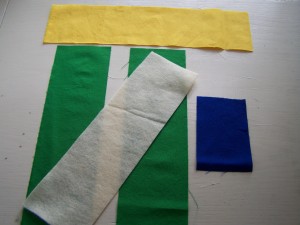
Cut the fabric. We measured the intended wearer over a collared shirt to figure out how big it needed to be. Then we added 2 inches to this measurement to allow for closure placement and seam allowance.
- 1 Strap piece – 3″ x measurement+2.5″
- 1 Fusable interfaceing piece if you have it -3″ x measurement+2.5″ (my tutorial doesn’t since I couldn’t find the package)
- 2 Bow pieces – 3″ x 10″
- 1 Bow inner piece – fusable interfacing or felt (see above about lost interfacing)
- 1 Center piece – 2.5″ x 4.”
If using interfacing go ahead and iron it to the wrong side of your strap and one of your bow tie pieces. This is my preferred method.
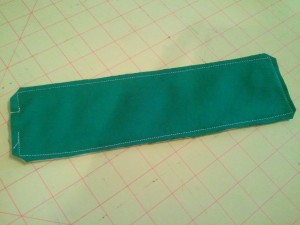
Fold strap piece in half and sew down long edge, use a 1/4″ seam allowance. Turn rightside out and fold ends in and press. When we sew the hook and loop on the ends we’ll sew up the ends.
*This is where the camera batteries die and I have to start taking crummy cell pictures*
Lay your bow tie pieces right sides together. If using a felt piece then place the felt under the fabric pieces against the wrong side on the bottom fabric. Sew around using a 1/4″ seam allowance, clip corners and excess fabric.
Turn right side out, making sure the felt is on the inside and the right side of the fabric is ending up outside. Then we iron again.
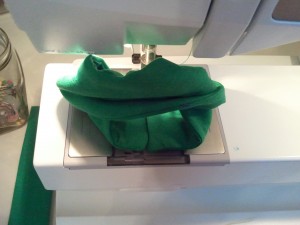
Use a zigzag stitch to sew the edges together. You have to sort of pull the other side of the loop up and away from the sewing area in order the sew straight down the seam.

Fold in half with the seam on the outside and then sew a 1″ line in the middle about a half inch from the folded edge. I switch to a leather or denim needle because the felt makes it pretty thick to work with.
Now we take our center piece, fold right sides together and sew it down the long side. I iron it presing the seam open and running down the middle, then turn rightside out. And press again. Yea, I iron a lot, but the clean lines make me happy. Keep the seam centered, so it will be hidden inside. 
Turn one end under and press. Then we’re going to tuck the unfolded in inside the folded end and sew together forming a little loop.
Accordian fold the bow bringing the top and bottom towards the middle with the stitching to the back. Then it gets a little fiddly because we have to wiggle the bowtie into the center wrap piece. 
And then thread the strap through too. I like to run a couple stitches through by hand to tack all the layers together in the back.
Sew on your hook and loop tape and then you’re all done!
Happy lil bow ties!


